Tag: Hanging Art

How to Set the Right Center Line for Art Placement and Height

The artwork’s center, not its top edge, is the right place to begin. On an open wall, position the center 57 to 58 inches above the floor, using 57 inches as the familiar baseline. This art placement and height guide shows how to adapt that starting point to furniture, a gallery wall, and the way a room is used.

It’s easy to focus on the frame’s upper edge or the height of the ceiling, yet a considered placement begins with the visual center of the work. Learn how to apply the 57-inch rule, align several pieces with balanced spacing, and calculate the precise hanger position from the artwork’s dimensions and wire. The result is a wall that feels composed rather than guessed at, allowing each photograph or print to settle naturally into the room.

Key Takeaways

  • Above furniture, balance the artwork’s scale with the piece below and leave a considered gap beneath the frame.
  • Plan a gallery wall as a unified composition, using consistent spacing and a clear alignment or anchor point.
  • Find the hanger position by measuring from the frame’s top to its wire or hanging point, then adding that distance to the intended center mark.
  • For rooms where people mainly view art while seated, adjust the placement to suit the room’s everyday perspective.

What is the 57 rule for hanging art?

The 57-inch rule is a starting point for placing art, not a fixed height for every wall. Above furniture, the furniture’s top edge and the artwork’s scale help determine the final position.

  1. Assess placement above furniture

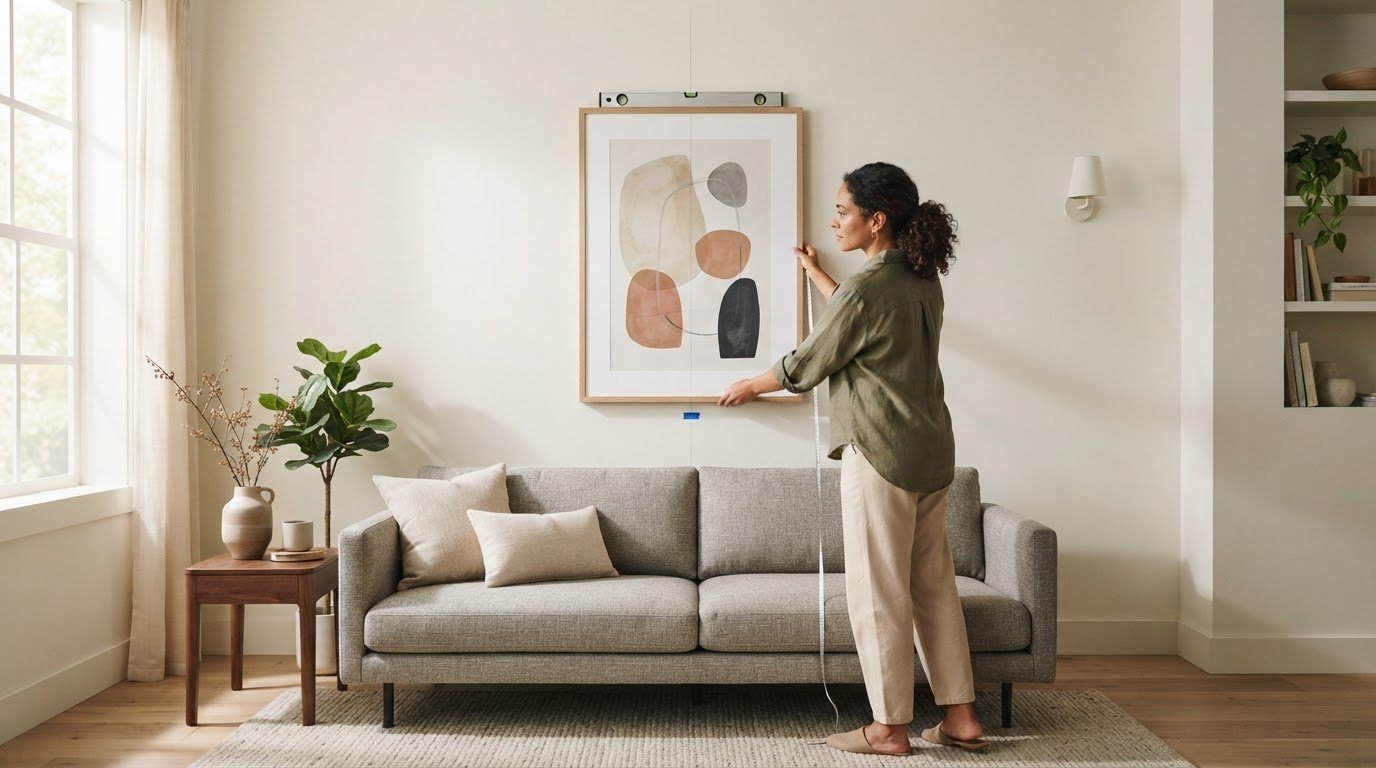
    Measure from the top of the sofa, console, or mantle, then place the artwork’s bottom edge about 6 to 8 inches above it. This gap keeps the frame visually connected to the furniture without crowding the surface. Before hanging art, mark the proposed position and assess it from across the room. For safer placement, keep frames securely mounted and clear of areas where people might bump them.

  2. Set height above sofas, beds, and consoles

    Position art above a sofa, bed, or console with its bottom edge about 6 to 12 inches above the furniture. Choose a width that gives the arrangement presence: artwork above furniture should fill about one-half to two-thirds of the furniture’s width. For a single large piece, compare its frame with the furniture’s full span. Heavy artwork needs a secure hanging method suited to its weight and wall.

  3. Adapt placement to ceilings and staircases

    Keep the artwork’s centre near the usual viewing height, even in a room with a high ceiling; the ceiling height alone is no reason to raise the frame. Above a staircase, arrange a sequence to follow the wall’s rising line, then view it from the steps and landing. Check that the frames align with the stair angle and don’t intrude on the walking path.

  4. Position art in hallways and entryways

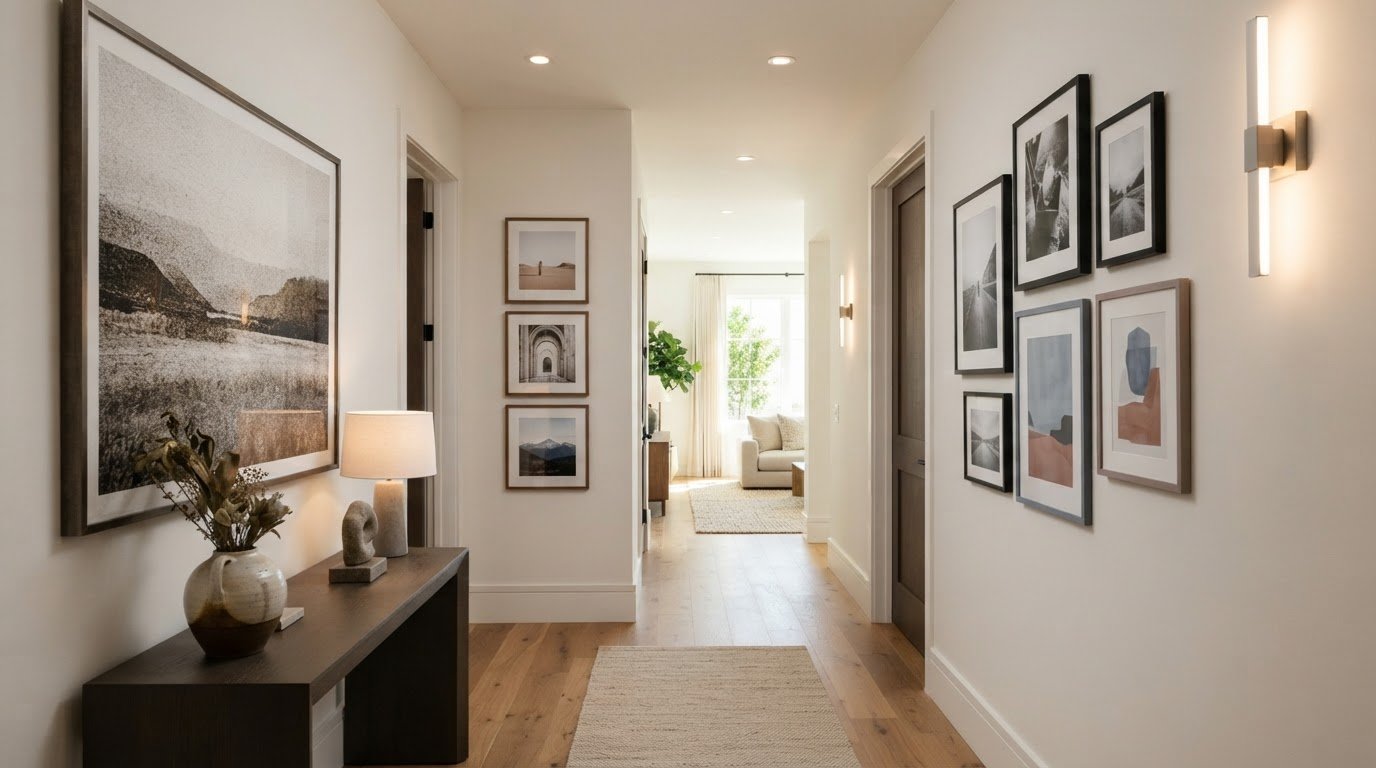
    Center a piece on the available wall space in a hallway or entryway, using the 57-inch center-height rule as a starting point. In a narrow passage, consider the sightline from the entrance and from the route through the hall. Keep artwork clear of doors and busy corners, and choose a scale that suits the wall rather than overwhelming the walkway.

Spacing and aligning multiple artworks

For a gallery wall, plan the full arrangement before marking individual hanger points. Framing and matting change each piece’s outer dimensions, so measure spacing and alignment from the finished frame edges.

  1. Align framed artwork

    Lay the framed pieces out on the floor, then choose a shared alignment: top edges, centre lines, or a clean grid. For a grid, keep frame edges straight and repeat the same gap across each row and column. Check the outer frame dimensions, not just the visible image, so different mats or mouldings don’t make aligned artwork look uneven.

  2. Space pieces in a grouping

    Set frames about 2-3 inches apart for a close, cohesive gallery wall. If the works need more visual breathing room, use gaps of 3-6 inches, keeping the spacing consistent across the grouping. Place the pieces on the floor first, then adjust the arrangement until it reads as one composition rather than separate works scattered across the wall.

  3. Account for framing and matting

    Measure each finished frame, including its mat, before deciding where its centre or edge should sit. A wider mat increases the overall dimensions and can change a piece’s visual weight, even though the image itself stays the same. Use the outside dimensions to set the spacing, then assess how the visible artwork sits within each frame.

For a mixed collection, choose one anchor piece and arrange the remaining frames around it. Keep their gaps deliberate, and compare the outer edges from a few steps back; a small shift can make a grouping feel unbalanced. If framing decisions affect your layout, Galerie Prints’ Bespoke Framing Service offers a considered next step for bringing the pieces into a coherent arrangement.

Calculating hanger placement from the artwork’s center

Mark the artwork’s centre height first, then calculate the hook position from the frame’s hanging hardware. This keeps the centre line accurate, even when the wire sits well below the top of the frame.

  1. Find the recommended artwork center height

    Mark the wall at 57 to 58 inches from the floor for the center of artwork on an open wall. This measurement refers to the artwork’s midpoint, not the nail or hook. If people regularly view the piece while seated, lower the center until it feels comfortable from the main seat, rather than relying on a standing sightline.

  2. Avoid hanging artwork too high

    Measure the frame before placing a hanger, and don’t use its top edge as the height reference. A frame can look too high when its centre sits well above the intended viewing line, even if its top edge seems aligned with nearby decor. In a room with high ceilings, keep the same centre-height baseline rather than raising the artwork to fill the wall.

  3. Position vertical artwork

    Measure the full height of a vertical frame, then divide that measurement in half to find its center. For a 34-inch-tall framed work, the center is 17 inches from either edge. Align that midpoint with the chosen wall mark; the artwork’s portrait orientation doesn’t change how its center is calculated. Check the sightline from the room’s main viewing position.

  4. Measure from the frame’s top to its wire’s highest hanging point while the wire is gently pulled taut. For the 34-inch example, a wire 10 inches below the top places the hook 7 inches above the 57-inch center mark, at 64 inches from the floor. Mark that hook point, then assess lighting from the intended viewing position; shift the artwork slightly if a light source creates distracting glare.

The 57- to 58-inch center-height baseline

Use the artwork’s centre as the reference point on an open wall, rather than measuring to its top edge. This baseline creates a consistent visual line for positioning a single piece or planning a gallery arrangement.

  1. Measure 57 to 58 inches up from the floor and mark the wall. That mark represents the center of the artwork, not its hanger. The 57-inch point is a useful starting baseline; the 57- to 58-inch range gives a little room to judge how the piece sits in its particular setting.
  2. Centre one artwork on the mark by measuring its full framed height and finding the midpoint. A tall, narrow piece still uses its vertical centre, while a wide piece uses its horizontal midpoint. Base the measurement on the framed work’s outer dimensions so the visible composition sits where you intend.
  3. For a gallery wall, treat the arrangement as one large artwork. Find the overall grouping’s top and bottom edges, then mark its midpoint at about 57 inches above the floor. This keeps the collection aligned as a whole, even when individual frames differ in shape or size.
  4. Keep the baseline even in rooms with high ceilings; don’t raise a piece simply to fill more wall space. If the room is mainly used while seated, adjust the artwork lower until it feels comfortable from the primary seat. A modest shift of 2 to 3 inches can suit the room’s daily use while preserving the composition.
  5. Before making a hole, mark the centerline and step back to view the work from the room’s main approach. If you’re planning a wall around Star Wars Limited Edition Prints, use the same center-height principle to give the chosen print a considered place within the room.

Galerie Prints: The Slim Aarons Collection

Galerie Prints brings photographic heritage into the home through The Slim Aarons Collection, a considered starting point for choosing work that suits your room and its intended placement. Once you’ve measured the wall and established its centre line, explore imagery that could become the focus of a living space, hallway, or carefully arranged gallery wall.

For a different visual character, browse Terry O’Neill Photography, Cinema Lobby Cards, or Star Wars Limited Edition Prints. Compare each work’s proportions with the available wall space and nearby furniture, then use the placement principles above to plan where it will hang. This lets you consider the image and its setting together, from the initial choice through to the final alignment.

Contact Galerie Prints to explore its collections.

Let the Artwork Shape What Comes Next

A carefully placed image can do more than complete a room. It can establish a mood, draw the eye to a considered detail, and offer a fresh perspective each time you pass. Use this art placement and height guide as a starting point, then let the character of your chosen work shape the space around it.

Galerie Prints offers The Slim Aarons Collection, Terry O’Neill Photography, and Cinema Lobby Cards, each bringing its own visual history and atmosphere to a room. Explore the imagery that feels right for your setting, and consider how its presence might shape the room’s character over time.

Contact Galerie Prints for art advice as you consider the next piece for your walls. A thoughtful choice can make the room feel distinctly your own.

Frequently Asked Questions

How high should art be hung?

On an open wall, start with the artwork’s center about 57 to 58 inches above the floor. Then judge the placement from the room’s usual viewing position, rather than relying only on a measurement. If the piece sits above furniture, the relationship between its lower edge and the furniture may guide the final position more than the open-wall baseline.

What is the standard height to hang art on a wall?

A common standard places the artwork’s center 57 inches above the floor. Measure to the center of the complete framed piece, not its upper edge or hanging hardware. In a gallery arrangement, use the center of the whole grouping as the reference. That keeps the composition coherent even if individual frames have different proportions.

How do you choose the right art size for a wall or furniture?

Above furniture, choose artwork or a grouping that spans roughly one-half to two-thirds of the furniture’s width. On an open wall, consider the surrounding space and the visual weight of nearby furnishings. For example, a narrow vertical frame may suit a slim console, while a wider arrangement can balance a longer sofa.

How much space should be between multiple pieces in a gallery wall?

For a close, unified gallery wall, leave about 2 to 3 inches between frames. A wider gap of 3 to 6 inches can give a grouping more visual separation. Choose one spacing and repeat it throughout the arrangement. Before hanging, check the gaps at frame corners and along rows, where small inconsistencies are easiest to notice.

How do you measure and mark art placement before hanging?

First, measure the framed artwork and mark its intended centre on the wall. Then measure from the top of the frame to the taut hanging wire or fitting to find the hanger position relative to that centre. For a group, lay out the pieces on the floor or use paper templates, and mark each hanger only once the full arrangement looks balanced.
Decorating a Hallway with Art: A Practical Guide to a More Considered Space

What if the hallway were more than a passage between rooms, and became the first glimpse of your home’s character? Decorating a hallway with art can give even a narrow or overlooked space a sense of purpose. But filling every bare patch of wall may leave it feeling cluttered rather than considered. Plan around the route through the space, so each work can be seen in relation to the next and to the rooms beyond.

It’s easy to misjudge scale or hanging height in a corridor, where viewing angles and proportions differ from those in a living room. A thoughtful arrangement can balance the walls, while carefully chosen imagery and framing connect the hallway to your home’s wider palette and mood.

This guide will help you assess your hallway, choose artwork suited to its proportions and arrange it with confidence. We’ll cover hanging height, spacing, gallery-wall layouts and framing, including how exhibition-quality photographic prints and bespoke sizing can help a work feel at home. The result is a more welcoming transition, with a visual rhythm that rewards both a passing glance and a pause.

Key Takeaways

  • Start decorating a hallway with art by considering the route through the space, its proportions and how it connects to adjoining rooms.
  • Measure the usable wall area, noting how doors, switches, mirrors and furniture shape your options.
  • Choose a single statement piece, a linear sequence or a compact cluster to suit your hallway’s shape and viewing distance.
  • Use image subject, colour and contrast to complement nearby rooms and respond thoughtfully to the hallway’s lighting.
  • Refine the final look with suitable framing and sizing, then explore exhibition-quality photographic prints for a considered finish.

Why Decorating a Hallway with Art Changes the Feel of Your Home

A hallway is a space for movement, not usually a room where people linger. Yet it shapes the experience of arriving home and offers an early impression of the rooms beyond. Decorating a hallway with art gives this passage its own visual identity, making the walls part of the home’s story rather than an afterthought.

A successful display is more than a collection of frames filling available space. It respects the hallway’s proportions and the way people move through it. A work positioned where the route opens up can invite a pause; a sequence along a longer wall can create a gentle rhythm. Either approach makes the journey feel deliberate.

What role should artwork play in a hallway?

Think of the hall as both a passageway and a personal introduction. Decide what you want it to express: quiet continuity, a sense of discovery or a confident focal point. A restrained arrangement might use a shared colour palette or subject to create cohesion. One striking image, by contrast, can give a simple corridor a distinct centre of attention.

These approaches can work together. A prominent piece can sit among smaller works, or a sequence of images can feel calm through considered spacing and a common thread. Cohesion doesn’t require identical subjects, frame finishes or dimensions. Variety can feel collected and personal when each piece has room to be seen and the arrangement suits the wall.

How can art help a hallway feel more welcoming?

Repeated visual cues can give a long route a sense of intention. A recurring tone, subject or frame detail may guide the eye from the entrance towards the rooms beyond, creating small visual pauses as you pass. The effect comes not from matching every object, but from establishing a subtle conversation between works—a principle also central to supportive living spaces, where specialists like Find Memory Care use visual markers and art to create intuitive, reassuring environments.

Let adjoining rooms inform your choices without making the hallway a copy of either one. A colour from a nearby room might reappear in a photograph, while a contrasting subject can create a fresh moment between familiar spaces. If you’re exploring how different visual traditions might shape the mood, The History of Art offers a broad introduction to styles and periods.

Fine art photography can bring a personal point of view to this transition, from evocative interiors and landscapes to portraits that suggest another era. Consider how each image reads both in passing and at close range. A thoughtful display welcomes visitors, connects the character of adjoining rooms and rewards a second look without interrupting the natural flow of the home.

Measure Your Hallway Before Choosing Art

Before choosing a work, look at the hallway as a series of viewing opportunities rather than one long wall. Note its length, the width of each usable section, ceiling height and the distance from which someone will first see the art. A piece viewed from the far end may need a different presence from one encountered at close range beside a doorway.

Measure the clear wall area, not just the full stretch from corner to corner. Doorways, light switches, mirrors, radiators and console tables interrupt the visual field or limit where a frame can sit. For hallways featuring period furnishings, design insights from Nwtiques can help you balance scale and historic character alongside your wall decor. Mark their positions, including how doors open and where people naturally pass. This helps you avoid placing a work where it feels squeezed, obstructs everyday use or competes with another feature.

How do you choose artwork scale for a narrow hallway?

Choose a scale that suits the wall area the artwork will actually occupy. On a long, uninterrupted wall, one larger focal piece can create a clear point of attention. A sequence of smaller works may suit a corridor broken up by doors or changes in wall space, giving the eye a measured progression. Neither approach has a fixed size requirement; the test is whether the art feels balanced against its immediate setting.

Where should hallway art sit on the wall?

A useful starting point is to place the centre of the artwork at a natural standing viewing height. Galleries commonly use a centre point around 57 to 60 inches from the floor, but treat this as a guide, not a rule. Ceiling height, nearby furniture and the corridor’s sightlines may call for an adjustment. Check the proposed position from both ends and while walking past, since the artwork will be seen from changing angles.

Test the layout before committing. Cut paper templates to match the outer dimensions of the framed pieces, then tape them to the wall. Step back, approach from each direction and check that the arrangement clears switches, mirrors and door swings. If a template feels too large in the actual corridor, revise the plan before choosing the artwork.

  1. Measure the hallway, wall sections, ceiling height and viewing distance.
  2. Mark obstacles such as doors, switches, mirrors and furniture.
  3. Mock up the proposed artwork positions with paper templates.
  4. Review the arrangement from both ends and along the route.

Once the layout feels right, accurate measurements can guide choices such as custom sizing and framing. Explore exhibition-quality photographic prints suited to your hallway’s proportions.

Choose a Hallway Art Layout That Suits the Space

The best layout follows the architecture rather than forcing a preferred style onto it. A short hall with one uninterrupted wall may suit a single image, while a longer corridor can support a sequence that carries the eye along its length. Where doorways divide the wall into smaller sections, a compact cluster can bring those areas together. Each arrangement feels composed when it leaves the route clear and gives the artwork room to register.

Use this comparison to find a starting point, then adjust it to the available wall space and the way the hall is experienced.

Layout Suitable space Visual effect Planning consideration
Single statement piece A short hall or a clear, uninterrupted wall section Creates a distinct focal point Allow enough surrounding space for the work to stand on its own
Linear sequence A long, relatively continuous corridor wall Establishes a steady visual rhythm along the route Keep spacing and alignment considered as the wall changes
Compact cluster A wider landing or a contained wall area between openings Forms a concentrated, layered composition Plan the group as one overall shape, not isolated frames

When does a single statement piece work best?

One focal image often suits a short hallway, where a sequence could feel compressed or a cluster might compete with nearby doors. Its impact depends on proportion and negative space. A work that nearly fills the available wall can feel imposing, while generous space around it gives the composition a quieter presence. Choose an image that feels at home with the wider interior, so the hallway makes a clear impression without seeming detached from the rooms beyond.

How can a sequence or gallery wall feel balanced?

For a sequence, repeat the spacing or alignment to give the eye a reliable rhythm, even if the photographs, frame finishes or formats vary. In a cluster, treat the outside edges as one larger shape and balance the visual weight across the group. Lay out the proposed arrangement on the floor before hanging it, preserving the relative gaps as you test alternate positions. Account for door openings and changing sightlines so no piece feels stranded or crowded as someone walks past.

Gallery walls benefit from planning before a single hook goes in. Sketch the wall and mark its boundaries, then arrange paper outlines or the framed works on the floor to see how the composition reads as a whole. A step-by-step gallery-wall guide can help with the broader process; the hallway-specific test is whether the arrangement remains clear from the approach as well as at close range. Consistent spacing adds structure, not uniformity, so a personal mix of images can still feel deliberate.

Select Art, Colour and Framing for Hallway Conditions

With the layout established, consider how each image relates to the hallway’s colours and light. Artwork doesn’t need to repeat the wall colour to belong there. It might echo a tone from an adjoining room, offer measured contrast against a pale wall or introduce a quieter note among richer colours. Subject matters too: a portrait, landscape or cinematic photograph sets a different mood as someone moves through the space.

Look at the image and its setting together. A photograph with strong tonal contrast can remain legible against a busy wall or in a dim passage; softer gradations may feel more integrated where the surroundings are calm. Neither is universally right. Choose a palette and subject that feel intentional beside the wall finish and the rooms around it.

What artwork works in a dark or windowless hallway?

Observe the hallway’s lighting at different times, including the effect of any ceiling or wall lights. In a dim corridor, compare subtle imagery with stronger contrast, and consider whether details remain easy to discern from the usual viewing distance. A restrained palette can sit harmoniously with the interior, while brighter tones may introduce another note. Neither guarantees that the space will appear lighter.

If possible, review a print in the hallway’s own lighting before settling on its position. Light can change how colours and tonal differences read, so an image that feels balanced elsewhere may have a different presence in the corridor.

How should frames complement hallway artwork?

A consistent frame treatment can lend a sequence or cluster visual unity, while deliberate variation can give a collected arrangement more character. In either case, consider how the frame’s visual weight relates to the image and the available wall space. The frame should support the artwork, not make a narrow passage feel busier. A dedicated guide to bespoke framing can offer further help with this choice.

Artwork and framing solve different parts of the design. First decide how the image’s subject, contrast and palette work in the hallway, then choose a frame that suits both the print and its surroundings. If a standard proportion doesn’t sit comfortably within the planned composition, custom sizing and cropping can help adapt the image to the space. Galerie Prints also offers bespoke framing for a tailored finish.

When decorating a hallway with art, assess each work in context rather than choosing by colour or subject alone. Consider how the print reads against the wall, under the available light and beside its frame. Explore Galerie Prints’ exhibition-quality photographic prints and bespoke framing as you refine a display for your hallway.

Bring Your Hallway Art Plan to Life with Galerie Prints

A considered hallway display comes together in stages: assess the available wall space, choose a layout that suits the route, then refine the image and its framing. With those decisions in place, you can select a print for a defined purpose rather than choosing an image first and trying to make it fit afterwards. The result can connect more closely to the character and proportions of your home.

Fine art photography offers a wide range of visual moods, from quietly atmospheric imagery to portraits and scenes with a more pronounced presence. Galerie Prints offers exhibition-quality photographic prints, alongside bespoke options to adapt a chosen work to a particular wall and composition.

How can a print be tailored to a hallway?

Custom sizing can help a print sit comfortably within the planned arrangement, whether it will serve as a focal point or form part of a group. Cropping offers another way to shape the composition, bringing attention to details that work well at the viewing distance and proportions of the hallway. These options are useful when a wall’s usable area has a distinctive shape or when a chosen image needs to relate carefully to nearby frames.

Galerie Prints’ bespoke services include printing on any substrate. Aluminium, wood and glass are examples, not an exhaustive list. Consider the substrate alongside the image, the interior and the display’s intended character, so the finished work feels deliberate within the space.

What should you settle before choosing a print?

Before making a final selection, note the exact wall or wall section the artwork will occupy, the layout you’ve chosen and the mood you want the hallway to convey. Decide whether the image should provide a quiet pause, introduce a distinctive subject or create continuity with an adjoining room. Then consider the frame alongside the image: its visual weight and character will affect how the finished piece relates to the wall and neighbouring works.

Keep your measurements and paper mock-up nearby as you browse. They provide a practical reference for comparing image proportions with the space and judging whether a single print or a group will feel balanced. If a composition needs adjustment, custom sizing and cropping can help shape the artwork to the plan, rather than forcing the plan around an unsuitable format.

With the wall, layout and visual mood in mind, explore Galerie Prints’ exhibition-quality photographic prints and consider bespoke sizing, cropping and framing for a display that feels at home in your hallway.

Let Your Hallway Tell a Story Over Time

A hallway display doesn’t have to feel complete in a single afternoon. It can grow as you discover photographs that speak to you, or change as the rooms around it evolve. Leave space for a future addition, or let one carefully chosen image remain the quiet centre of the composition. The most enduring displays feel personal, with each work earning its place rather than filling a wall for its own sake.

That’s the pleasure of decorating a hallway with art: a familiar route can offer a new detail to notice each time you pass, while still feeling connected to the wider home. Choose a subject you’ll enjoy seeing in the everyday rhythm of arriving, leaving and moving between rooms. When you’re ready to find the image that gives the space its own character, explore exhibition-quality photographic prints at Galerie Prints. A thoughtful choice can make the hallway feel unmistakably yours.

Frequently Asked Questions

How high should you hang art in a hallway?

A useful starting point is to place the centre of a single artwork about 57 to 60 inches (145 to 152 cm) from the floor. For a group, treat the whole arrangement as one piece and find its visual centre, rather than centring each frame separately. Stand back and check the result from the hallway entrance and while walking past. The position should feel comfortable to view without drawing attention to the ceiling or floor.

What size art is best for a narrow hallway?

Choose artwork in proportion to the clear wall area and the distance from which it will be viewed. A tall, narrow piece may suit a slim wall section, while a small work can feel lost on a broad expanse unless it’s part of a considered grouping. Before choosing, outline the frame dimensions on paper and check whether the piece leaves the passage feeling open. Let the usable wall, not the hallway’s full length, guide the scale.

How do you arrange pictures along a long hallway?

For a long corridor, arrange pictures in a steady line or sequence that responds to doorways and changes in the wall. Keep the spacing consistent; around 2 to 3 inches between frames is a common gallery-wall guideline. Before hanging, check that the first and last works don’t feel stranded at the ends and that the sequence reads clearly from both directions. Leave gaps where the wall is crowded by switches, mirrors or openings.

Can you mix different frame styles in a hallway?

Yes, different frame styles can work together if the overall arrangement has a unifying detail. Vary frame profiles while keeping a related tone, or mix finishes and let a shared subject or palette tie the images together. In a narrow corridor, use variation with intention: a cluster can feel more eclectic, while a long sequence may benefit from a repeating feature that guides the eye along the wall.

How do you decorate a dark hallway with art?

Choose imagery after observing the hallway under its usual lighting, since subtle details and colours can read differently in a dim space. Stronger tonal contrast may help an image remain distinct, while a restrained palette can sit quietly with the walls. LED lighting is often recommended for home artwork because it emits no damaging UV rays or significant heat. Assess the print where it will hang, and don’t rely on art alone to brighten the corridor.

Should hallway art match the artwork in adjoining rooms?

No, hallway art doesn’t need to match adjoining rooms or repeat their subjects. A more considered connection can come from echoing a colour, mood or period while choosing different imagery for the passage. For example, a contemporary portrait might sit between rooms with landscape art if its tones relate to the surrounding palette. This lets the hallway feel part of the home without making each space look identical.

What Size Art for Above a Sofa? The Curatorial Guide to Perfect Proportions

What if the most evocative Slim Aarons photograph loses its narrative power simply because it’s dwarfed by the furniture it was meant to crown? It’s a common frustration for collectors who find themselves questioning exactly what size art for above sofa installations will yield that elusive, gallery-standard balance. You’ve likely felt that unsettling realization when a piece you love feels lost against a sprawling wall, or perhaps you’re hesitant to commit to a large-scale Terry O’Neill print for fear of overwhelming the room’s silhouette.

We understand that selecting art is an investment in heritage and atmosphere, not just a search for decor. This curatorial guide will teach you to master the art of scale, moving beyond guesswork to apply the precise proportions used by professional designers. You’ll learn the essential two-thirds rule, how to account for the added dimensions of bespoke framing, and why pieces 40 inches or wider are defining the most sophisticated interiors of 2026. By the end, you’ll have the confidence to transform your living space into a balanced, luxurious sanctuary that honors the prestige of your collection.

Key Takeaways

  • Discover why your sofa serves as the room’s primary anchor and how to select art that acts as a commanding, proportional visual crown.
  • Master the definitive 2/3 to 3/4 ratio to determine exactly what size art for above sofa installations will create a perfectly balanced, gallery-standard silhouette.
  • Learn to calculate the critical difference between raw print dimensions and final wall size by accounting for the prestige of bespoke framing and mounting.
  • Evaluate the compositional power of a single, large-scale statement piece versus the narrative rhythm and visual flow of diptychs or triptychs.
  • Align the aspirational scale of your chosen subject matter, from Slim Aarons’ sun-drenched vistas to iconic music archives, with your room’s unique architectural proportions.

The Significance of Scale: Why Art Proportions Above Your Sofa Matter

In the world of high-end interior design, the sofa acts as the foundational anchor of the living space. It defines the room’s orientation and dictates the flow of conversation. However, a sofa without the right accompaniment remains a silhouette in search of a story. When you consider what size art for above sofa placement, you’re looking for the “visual crown.” This piece completes the architectural narrative. If the proportions are off, the entire room feels unsettled. A piece that is too small creates a “floating” effect, where the art seems to drift aimlessly on the wall. This disconnect makes even the most prestigious print appear like an afterthought, instantly diminishing the perceived value and sophistication of the space.

Achieving the “Curatorial Proportion” requires a sophisticated balance. It’s not merely about the physical frame. You must consider the intricate relationship between your ceiling height, the sofa’s total length, and the “breathable” white space surrounding the work. According to 2026 market trends, there is a distinct move toward oversized statement pieces. Collectors are increasingly favoring works 40 inches or wider to create a bold focal point. This approach ensures the art commands the room rather than merely occupying it, allowing the viewer to appreciate the technical superiority and historical significance of the work without visual clutter.

To find inspiration for these statement pieces, you can learn more about On The Edge Gallery and explore their collection of contemporary works designed to make a lasting impact.

The Psychology of Large-Scale Photography

Large-scale photography does more than fill a void; it creates an immersive window. An expansive Slim Aarons vista or a life-sized Terry O’Neill portrait invites the viewer into another world. This is the primary distinction between a mere decoration and a true statement piece. Visual weight also plays a crucial role in how we perceive scale. Darker, high-contrast photography often feels heavier and more substantial. Consequently, a moody, dark-toned image might require slightly more “breathable” wall space to avoid feeling cramped, whereas a lighter, more ethereal print can occupy a larger percentage of the wall without overwhelming the senses.

Common Sizing Pitfalls to Avoid

The most frequent error in luxury homes is the “Postage Stamp” mistake. This occurs when a small, solitary print is placed on a vast wall, leaving it looking disconnected. Conversely, art that is significantly wider than the sofa itself creates a top-heavy arrangement that feels oppressive and unstable. The ideal visual horizon ensures the eye travels naturally from the sofa’s silhouette back to the art. To maintain this connection, the bottom of the frame should typically sit 6 to 10 inches above the sofa back. Determining what size art for above sofa displays best usually involves the “Two-Thirds Rule,” ensuring the art spans approximately 60% to 75% of the sofa’s width for a balanced, gallery-standard result.

The Golden Ratios: Calculating the Perfect Art Size for Your Sofa

Precision is the hallmark of a well-curated home. When you’re deciding what size art for above sofa placement, the most reliable guideline is the 2/3 to 3/4 rule. This formula ensures your chosen work spans a significant portion of the sofa’s width without extending beyond its physical boundaries. If the art is too narrow, it looks like a lonely island. If it’s too wide, it creates a top-heavy imbalance that makes the furniture feel fragile. By adhering to this ratio, you anchor the seating area and create a cohesive focal point that feels intentional and luxurious.

While your eye for aesthetics is vital, the mathematics of the room provide the necessary boundaries for that beauty to thrive. For a standard sofa, the art should ideally cover roughly 60% to 75% of the space above the back cushions. This creates a visual “sweet spot” where the artwork feels like a natural extension of the furniture rather than a separate, disconnected element. Our bespoke framing service ensures these final dimensions are calculated with millimetre precision, accounting for the mount and frame profile to reach these ideal ratios.

Sizing Math for Standard Sofa Widths

Standard sofa dimensions provide a helpful baseline for your curatorial calculations. Consider these common configurations:

  • The Loveseat (approx. 150cm): Aim for an art width between 100cm and 115cm. This scale provides enough presence to command the wall while respecting the compact nature of the seating.
  • The Three-Seater (approx. 210cm): This common size requires a more substantial piece, ideally between 140cm and 160cm wide. A single, large-scale Terry O’Neill print is often the perfect candidate for this silhouette.
  • The Grand Sofa or Sectional (230cm+): For these expansive silhouettes, you’ll need art that measures 180cm or wider. If a single print of that magnitude isn’t feasible, consider a triptych or a multi-panel set to bridge the gap across the wall.

The Height Factor: How High to Hang?

Height is the final piece of the puzzle in determining what size art for above sofa installations. The “Golden Gap”—the distance between the top of the sofa and the bottom of the frame—should ideally be 15cm to 20cm (6-8 inches). This keeps the art connected to the furniture rather than floating in isolation. For those with high ceilings, you might feel tempted to hang the art higher to fill the vertical void. Don’t. Instead, prioritize vertical height within the piece itself by choosing a portrait orientation. This draws the eye upward while maintaining the 57-inch rule, which suggests that the center of the artwork should sit at the average human eye level for a true gallery experience.

While the mathematical ratios discussed previously provide the necessary architectural stability, the choice of composition determines the emotional resonance of the room. A single, commanding fine art photography print offers a sense of serene confidence, acting as a singular window into a specific moment of heritage or beauty. This approach is particularly effective when the subject matter is complex or deeply evocative, allowing the viewer’s eye to linger without distraction. Conversely, diptychs and triptychs allow for a narrative arc, where a story unfolds across multiple frames, creating a rhythmic visual cadence that spans the length of the sofa.

For those who prefer a structured, museum-like environment, a grid layout of black and white pictures provides an air of quiet authority. This arrangement relies on absolute precision, where uniform framing and identical spacing create a cohesive unit. It is an excellent strategy for displaying archival collections or music photography, where the collective impact of the series outweighs the individual power of a single shot. The salon-style gallery wall offers a more personal, eclectic alternative, mixing various sizes while maintaining a strict “outer” boundary to ensure the display feels like a curated collection rather than a random assortment.

The Triptych Advantage for Extra-Long Sofas

Extra-long sofas often present a unique challenge when determining what size art for above sofa displays. A single frame measuring over 180cm can be difficult to manage logistically, particularly when navigating narrow hallways or historic staircases. Triptychs offer an elegant solution. By splitting a single panoramic vista or grouping three related works, you achieve the necessary scale with greater ease. To ensure they read as a single, unified entity, maintain a consistent spacing of 5cm to 10cm between frames. This “breath” between pieces adds a modern, architectural layer to the installation while honoring the primary subject matter.

Mastering the Gallery Wall Above a Sofa

Creating a gallery wall requires a delicate balance of variety and restraint. The most successful arrangements begin with a “hero” piece, a larger work that anchors the collection and draws the eye first. From this anchor, you can build outward using the “Invisible Box” technique. This involves keeping the outer edges of the entire arrangement within a defined rectangular boundary that adheres to the 2/3 width rule. This ensures the total arrangement respects the previously established guidelines for what size art for above sofa installations. For a more detailed walkthrough on arranging these complex displays, see our guide on how to create a gallery wall.

The Bespoke Factor: How Framing and Mounting Affect Final Dimensions

A common oversight when determining what size art for above sofa displays is the distinction between the image itself and its final footprint. While you might purchase a specific print size, the “Final Wall Size” is the only metric that truly matters for your room’s proportions. In the world of high-end galleries, a print is rarely hung in isolation. It’s cradled by a mount and secured within a frame, both of which add significant physical inches and visual weight to the installation. Failing to account for these additions often leads to a piece that feels unexpectedly crowded or, conversely, perfectly sized despite a smaller initial print dimension.

The mount, or mat, serves as a silent curator, providing the necessary “breath” for a piece to be fully appreciated. For the sun-drenched vistas found in the Slim Aarons collection, a generous mount adds a layer of prestige and historical distance. It elevates the work from a simple photograph to a preserved artifact. Beyond aesthetics, the frame itself adds substantial width. A standard 2-inch timber frame, when applied to both sides, adds 4 to 5 inches to the total horizontal span. For those seeking a more contemporary, avant-garde silhouette, the “Floating” mount offers an alternative that allows the paper’s edge to be seen, providing a sense of raw, artisanal authenticity.

Calculating the Frame’s Footprint

To achieve a gallery-standard finish, you must incorporate the mount and frame into your initial 2/3 width calculation. Standard mount widths typically range from 5cm for smaller works to 10cm or more for large-scale statement pieces. If you’re working with a three-seater sofa, a 10cm border on each side of the print adds a total of 20cm to the width before the frame is even considered. This “luxury of space” is a hallmark of premium interiors, as wider mounts are currently trending in elite design circles to emphasize the exclusivity of the work. You can explore these archival options through our bespoke framing service to ensure your final piece meets these exacting standards.

Selecting the Right Frame Style for Your Sofa’s Aesthetic

The frame’s profile should mirror the architectural language of your seating. Minimalist, low-profile sofas pair beautifully with slim, modern aluminium frames that disappear into the background, allowing the photography to take center stage. For more traditional or mid-century modern silhouettes, classic timber frames in oak or walnut provide a sense of permanence and warmth. Consider the room’s existing hardware or the sofa’s legs when selecting a frame color. A black frame might ground a light-colored sofa, while a natural wood finish can soften a high-energy room. This cohesion ensures the art feels like an integral part of the home’s heritage rather than a fleeting addition.

Curating the Collection: Choosing Art that Fits Your Space and Soul

While the mathematical precision of ratios provides a structural foundation, the final selection must resonate with the room’s soul. The subject matter should mirror the energy of your seating area. A relaxed, linen-clad sofa in a coastal residence finds its partner in the sun-drenched, serene vistas of the Mediterranean. In contrast, a velvet-tufted mid-century piece might demand the raw, high-energy grit found in our music photography archives. This alignment of vibe and volume ensures the art doesn’t just sit on the wall; it lives within the space.

Determining what size art for above sofa displays requires an understanding of “aspirational scale.” Certain photographers demand larger formats to be fully appreciated. To view a work of significant historical provenance at a small size is to lose the nuances of the artist’s technique and the technical superiority of the production. Before committing, we recommend the “Tape-it-Out” method. Use low-tack painter’s tape to outline the proposed frame dimensions on your wall. This allows you to visualize the piece throughout the day, seeing how the light hits the space and ensuring the proportions feel commanding rather than crowded. Investing in archival quality means this focal point will remain a lasting piece of history, preserving original source materials for generations.

The Slim Aarons Effect: Wide-Angle Luxury

The legendary “Poolside” series by Slim Aarons is the quintessential example of photography that thrives on an oversized landscape format. These works often feature a strong horizon line that can visually “widen” a narrow room, creating an illusion of architectural depth. To capture the full aspirational lifestyle of the era, these prints should be hung with enough presence to act as a secondary window. Explore our curated Slim Aarons collection to find the iconic vista that matches your sofa’s silhouette.

Cinematic Scale with Lobby Cards and Posters

For collectors with a passion for the silver screen, cinema lobby cards offer a sophisticated alternative to single large prints. When arranged in a precise grid of 4 or 6, they create a rhythmic, collectable look that bridges the gap between art and history. If your living room serves as a media-centric sanctuary, a diptych of vintage movie posters can provide the necessary cinematic scale without feeling cluttered. When deciding what size art for above sofa placement, remember the four pillars of a perfect purchase:

  • Width: Does it respect the 2/3 rule while allowing for frame thickness?
  • Height: Is the center at eye level, approximately 57 inches from the floor?
  • Frame: Does the timber or aluminium finish complement the room’s hardware?
  • Soul: Does the subject matter evoke the wonder and nostalgia your home deserves?

Transforming Your Interior with Curatorial Precision

You now possess the discerning insight required to move beyond mere decoration and toward true architectural harmony. By mastering the golden ratios and accounting for the substantial footprint of bespoke framing, the question of what size art for above sofa installations becomes a matter of precise calculation rather than hesitant guesswork. You understand that a piece must not only occupy a void but must crown the room’s primary anchor with the appropriate visual weight and historical resonance.

Selecting a focal point is an act of stewardship for your home’s legacy. Our museum-quality prints are sourced from prestigious authorized archives, including Getty Images and the Terry O’Neill collection, ensuring every investment carries genuine provenance. With worldwide shipping and bespoke framing executed by master craftsmen, your journey from selection to installation is supported by technical excellence at every stage.

Explore our curated collections of Fine Art Photography and find your perfect statement piece. It’s time to let your walls tell a story of elegance and heritage that will endure for generations.

Frequently Asked Questions

What is the 2/3 rule for art above a sofa?

The 2/3 rule is a foundational principle of interior curation. It suggests that the total width of your artwork, including the frame and any mounting, should span between 60% and 75% of the sofa’s total width. This ratio ensures the art acts as a commanding visual anchor without overwhelming the furniture’s silhouette. It prevents the common error of choosing a piece that appears dwarfed by the seating below.

How high should art be hung above a couch?

Ideally, the bottom edge of your frame should sit 6 to 10 inches (15cm to 25cm) above the top of the sofa back. This distance, often called the “Golden Gap,” creates a cohesive connection between the furniture and the art. Hanging the piece any higher risks a “floating” effect, where the artwork feels disconnected from the room’s primary anchor and loses its narrative power.

Can I hang art that is wider than my sofa?

Hanging art wider than the sofa is generally discouraged in high-end design. Such an arrangement creates a top-heavy imbalance that makes the seating area feel fragile and unsettled. If you have an exceptionally large wall, it’s better to select a piece that adheres to the 75% width limit and then balance the surrounding space with architectural elements like floor lamps or sculptural greenery.

Should I choose one large piece or a gallery wall for my living room?

The decision depends on the emotional resonance you wish to create. A single, large-scale print offers a serene, museum-like focal point that emphasizes the prestige of the artist. A gallery wall allows for a more personal, narrative approach. Both strategies are successful provided the total arrangement respects the guidelines for what size art for above sofa installations to maintain a balanced silhouette.

How do I choose the right frame size for my art print?

When selecting a frame, you must calculate the “Final Wall Size” rather than just the print dimensions. A bespoke framing service will often include a 5cm to 10cm mount, which adds significant “breath” and prestige to the work. A substantial timber frame can add another 4 to 5 inches to the total horizontal span. Always use these final, outer dimensions for your proportional calculations.

What if my sofa is placed against a very large, high-ceilinged wall?

In rooms with soaring ceilings, prioritize vertical height within the artwork itself rather than hanging a smaller piece higher up. Choosing a portrait orientation or a tall triptych draws the eye upward while keeping the bottom of the frame near the sofa. This fills the vertical void while respecting the 57-inch eye-level rule, ensuring the collection remains accessible and impactful for the viewer.

Is it okay to lean art on the sofa back instead of hanging it?

Leaning art is a casual styling choice that lacks the permanence and quiet authority of a gallery-standard installation. For high-caliber photography, secure hanging is essential to protect the frame and the archival materials from accidental damage. A properly mounted piece conveys a sense of stability and historical significance, suggesting the work is a lasting piece of heritage rather than a temporary decoration.

How do I handle art placement if my sofa isn’t centred on the wall?

If your sofa is offset, you should center the artwork over the sofa rather than the wall. This maintains the critical visual relationship between the furniture and the art. When determining what size art for above sofa displays in asymmetrical rooms, use the sofa’s width as your primary guide. You can then balance the remaining wall space with secondary elements like a tall floor lamp or a curated pedestal.