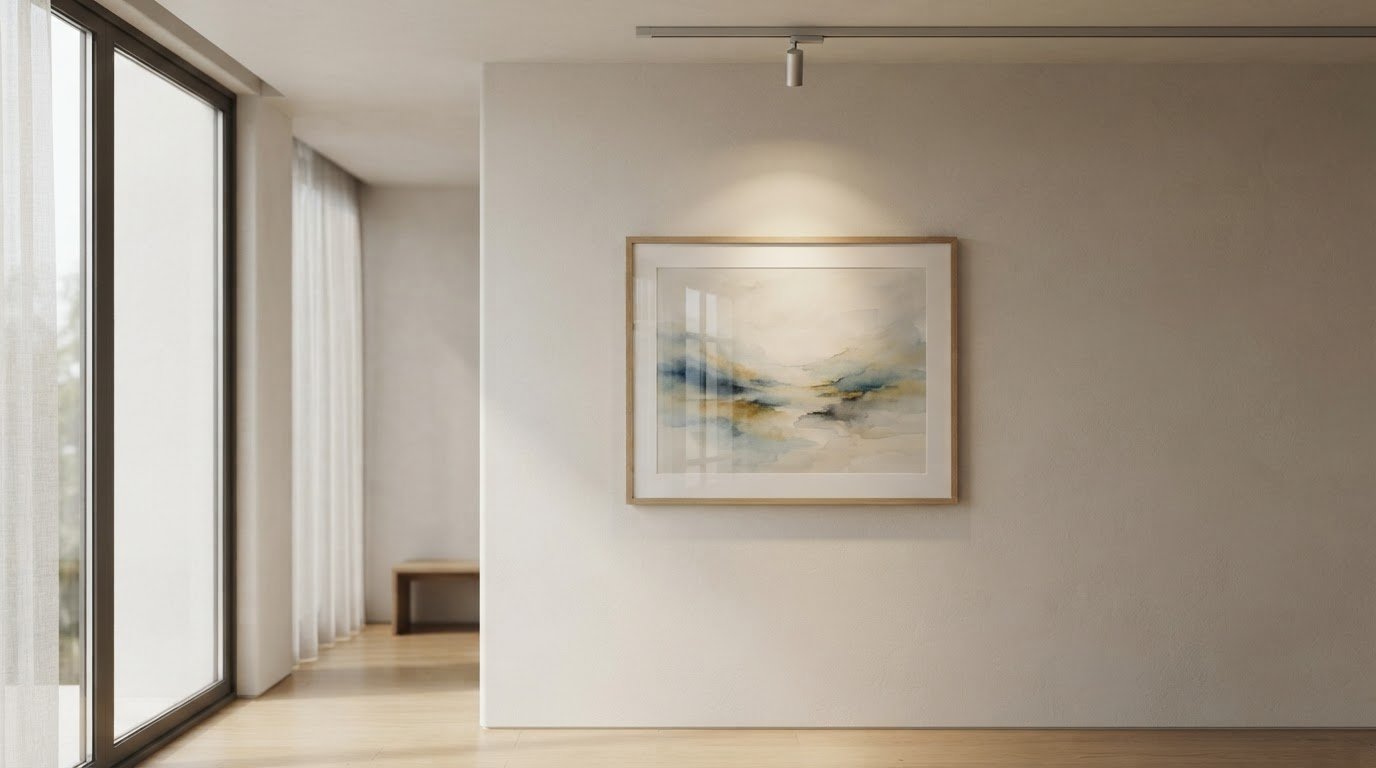
Tag: Art Lighting

Protecting Art From Sunlight Damage With Smarter Lighting

Sunlight can alter an artwork long before the change is obvious. Protecting art from sunlight damage begins with limiting direct exposure: place works away from bright windows, soften daylight with blinds or window film, and choose protective glazing where appropriate. For 19th-century prints and 20th-century photographs on printing-out paper, Denver Art Museum targets three to five foot-candles, a reminder that sensitive works call for carefully controlled light.

It’s natural to want a piece to feel luminous in a room, but prolonged daylight can gradually fade colours and weaken delicate image materials. Protecting art from sunlight damage means balancing display with preservation and adapting safeguards to the artwork, its position and the light it receives throughout the day.

Learn how UV and visible light affect art, why placement matters, and how protective glazing, blinds, window film and considered artificial lighting can reduce exposure. These choices help you enjoy photographs and prints while taking practical steps to care for them over time.

Key Takeaways

  • Match protective glazing and window coverings to the artwork and the light conditions in its room.
  • Use the changing path of daylight to guide placement, and avoid spots where direct sun falls across the work.
  • Light-sensitive photographs may need especially low display levels; museum practices show how carefully exposure can be managed.
  • UV is only part of the picture: visible light can also fade vulnerable materials, while heat adds another preservation concern.

UV-protective glass, blinds, and window film

UV-filtering glazing, window film and blinds can all help manage daylight around displayed art. Which is most useful depends on the work’s position and the light reaching it.

UV-Protective Glazing and Film

UV-protective glazing and window film are barriers designed to reduce ultraviolet exposure reaching artwork through windows. This matters because prolonged exposure can fade vulnerable image materials, even when a room feels comfortable. Glazing protects a framed piece at its surface, while film treats the window admitting daylight. UV-absorbing acrylic needs replacement every two years because its protective dye fades over time.

For photographs, framing choices also support careful display: use 4-ply or thicker museum board as a mat. This creates separation between the image and glazing, while the UV-filtering layer addresses light entering from outside. Film can cover a window without changing the artwork’s frame, making it useful when several pieces share the same sunlit room.

Costs of Art-Protection Options

The cost of UV window film, museum glass and other art-protection options varies with the size of the window or frame, the materials selected and the work involved. There is no single useful figure for every installation: a large window and a small framed print require different amounts of material. Blinds also vary in dimensions and construction.

Compare options by what they protect: glazing is fitted to an individual framed artwork, while film and blinds address light entering through a window. Existing frames may affect whether protective glazing fits without alteration. For a collection across several rooms, treating windows can address shared exposure. For one prized print, frame glazing may be the more direct measure.

Balancing Artwork Protection and Room Light

Protecting art doesn’t mean keeping every room dark. Adjust blinds to soften direct sun during the hours it reaches a particular window, then open them when that exposure passes. Window film offers another way to manage incoming light while preserving a naturally lit, usable room. The right choice depends on the window’s position and the artwork’s location.

For example, place a print away from the sunlit area and use blinds to temper the window rather than blocking every source of daylight. UV-filtering glazing adds protection at the frame, while ambient room light remains available. Combining a window treatment with thoughtful placement helps you enjoy both the room and the artwork.

Avoiding direct sunlight and UV exposure

Start with a daylight audit. Observe where sunlight falls on the walls as it moves across the sky, rather than judging exposure at just one moment. A bright patch beside a framed photograph in the morning may reach it later. Mark sunny areas on a simple room sketch, then choose walls outside their path. Distance from a window alone won’t reveal every hotspot.

Pay attention to reflected sunlight, too. A pale wall, polished table or mirror can redirect brightness towards a print across the room. If a framed image catches glare from a mirror opposite a window, for example, adjust the mirror or artwork’s position. This reduces concentrated exposure without removing all natural light. Check the image from different positions, not only from the doorway.

Sun paths shift with the seasons, so a placement that seems safe now may receive direct light later. Protecting art from sunlight damage means revisiting the wall as daylight changes. Look for moving beams across the frame at different times. If a work hangs near a window, observe the area throughout the day and note when exposure occurs.

Consider the artwork’s materials when choosing its position. Japanese prints made before 1867 may contain organic dyes susceptible to fading in bright light. Keep such a print away from a sunlit wall and avoid placing it where reflected glare lands. Photographs and coloured prints can also be vulnerable to prolonged brightness. This helps prioritize sensitive works instead of treating every framed piece alike.

In a room with several artworks, protecting art from sunlight damage means assessing each wall separately. A shaded alcove has a different exposure pattern from a spot beside a broad window. Use naturally shaded areas for sensitive pieces and brighter walls for less vulnerable objects. Reassess after moving furniture or mirrors, since those changes can redirect daylight onto a previously shaded surface.

Preventing sunlight damage to artwork

Light exposure accumulates, so both brightness and display duration matter. Lowering the illumination and limiting exhibition time can reduce the dose received by sensitive works. Museum practice offers a useful example: the Denver Art Museum targets three to five foot-candles for 19th-century prints and 20th-century photographs on printing-out paper. These restrained levels reflect the vulnerability of particular photographic and print processes, rather than a single brightness rule for every artwork.

Work type and condition also shape display decisions. The Denver Art Museum targets five to eight foot-candles for colour prints, and displays cyanotypes and colour Polaroids at three foot-candles. It rotates cyanotypes and colour Polaroids after six to eight weeks of exhibition, limiting each piece’s time on view. Rotation is a practical preservation measure: works can rest in storage while another piece takes their place.

Condition matters alongside process. For black-and-white prints in good condition, without staining or oxidation, the museum may use up to nine foot-candles, and rarely 10. Those higher levels are tied to the stated condition criteria; they aren’t a general target for every monochrome image. When assessing a print, look for visible staining or oxidation and consider whether its process is especially light-sensitive.

The key is to manage both light level and exposure time, tailoring display plans to the work. A rotating display can preserve variety without leaving one delicate image on view continuously. At home, apply the same principle: reduce illumination for vulnerable pieces, shorten their display periods, or alternate them with less sensitive works. The Library of Congress notes that, in most cases, conservation treatment cannot reverse light damage. Prevention matters before fading becomes visible, not after colours have shifted.

What types of light cause the most damage to art: UV, visible light, or infrared?

There is no single answer for every artwork: ultraviolet, visible light and infrared affect materials differently. UV can contribute to fading, but visible light matters too, because pigments and dyes respond to prolonged illumination. Infrared is associated with radiant heat, which can add stress when a work sits near a heat-producing light source. For a framed print, reducing UV alone does not eliminate exposure to visible light.

Visible light is the part that lets you see colour and detail, yet that same exposure can gradually alter sensitive materials. The risk depends on the image’s pigments, dyes, and process, as well as how long it remains illuminated. Japanese prints made before 1867 may use organic dyes susceptible to fading in bright light. A print’s age and materials therefore matter when choosing where and how long to display it.

UV-filtering glass or window film can reduce ultraviolet exposure, while blinds can temper incoming daylight. These measures address the light source, but the artwork still receives visible illumination from ordinary room lighting. Consider the whole display: a sunlit window, a nearby lamp and the work’s daily exposure all contribute. Moving a delicate image away from a bright beam can complement glazing, rather than relying on one protective layer.

Treat infrared as a heat factor, not as another term for UV. A lamp close to a frame may warm the surrounding area, so choose lighting that doesn’t place a heat source against the artwork. Assess the material first, then control direct daylight and avoid unnecessary illumination. This layered approach is more useful than treating UV protection as a complete solution.

For a considered display, explore limited-edition art prints and plan their placement around the room’s light.

Galerie Prints: The Slim Aarons Collection

Galerie Prints offers The Slim Aarons Collection for readers considering photographic art for a thoughtfully planned display. Once you’ve identified a suitable wall and considered its daylight, choosing a work can bring distinctive visual character to the room. The collection sits alongside Terry O’Neill Photography, Cinema Lobby Cards and Star Wars Limited Edition Prints, offering different subjects for a considered interior.

Placement and framing are part of enjoying a print over time. Consider the room’s changing light when deciding where a work will hang, and choose protective measures suited to that setting. Galerie Prints also offers a Bespoke Framing Service for artwork that calls for a tailored frame. To explore the collection or discuss your interests, visit galerieprints.com.

Choose artwork with its future setting in mind

A print’s place in a room shapes how it’s experienced, so consider the setting alongside the image itself. Protecting art from sunlight damage can begin before a work is hung: imagine how its colours, subject and scale will suit the room over time. This brings preservation into the pleasure of choosing art, rather than leaving it as an afterthought.

Galerie Prints offers The Slim Aarons Collection, Terry O’Neill Photography, and Cinema Lobby Cards, each with a distinct visual character. As you consider what belongs in your space, let your own interests guide the selection, then give the chosen work a setting suited to its care. For a personal next step, contact Galerie Prints for artwork advice. A considered choice can make your collection feel truly at home.

Frequently Asked Questions

How does sunlight damage paintings, photographs, and other artwork?

Sunlight can fade pigments and dyes, shifting an image’s original colours and reducing contrast. Photographs and prints made with light-sensitive processes may show changes sooner than more stable materials. Paintings can also be affected as their pigments respond to prolonged exposure. Since damage builds gradually, compare the artwork with a reference image or earlier photographs; subtle colour shifts can be easier to spot side by side.

What light levels are safe for displaying artwork, measured in lux?

There is no single safe lux level for every artwork: sensitivity depends on materials, condition and display duration. Lux measures the light falling on a surface, so take readings at the artwork rather than elsewhere in the room. A display plan should account for the image’s process and colourants. Delicate photographs and prints call for lower illumination than works that tolerate brighter viewing conditions.

How many hours of light exposure can artwork safely receive?

No single number of hours suits every artwork, because exposure depends on both brightness and material sensitivity. Even a low-lit work displayed for long periods receives cumulative exposure. For a fragile photograph, consider whether it needs to remain on view continuously or can alternate with another piece. Keeping a record of display periods can help you make consistent decisions about works rotated through a home or exhibition.

What UV-filtering window films and glazing protect art most effectively?

Choose film or glazing intended to reduce UV reaching the artwork, and compare the product’s stated UV performance before selecting it. Film treats light entering through a window, while glazing protects a framed piece. For work on a wall beside a large window, these measures address different parts of the display. Neither eliminates visible-light exposure, so placement and illumination still matter.

How should artwork be positioned and displayed to avoid direct sunlight?

Place sensitive work on an interior wall that doesn’t receive a moving beam of direct sun. Observe the room at different times, including as seasonal daylight changes, and look for reflected light from mirrors or polished surfaces. A print opposite a bright window, for example, may catch glare without facing the glass. Reassess its placement after rearranging furniture or reflective objects.

What archival materials and framing methods help protect art from light damage?

For a photograph, use 4-ply or thicker museum board as a mat, and select protective glazing suited to the framed work. Keep the image separated from glazing and avoid materials that could press against its surface. Framing is only one part of care: a well-prepared mount won’t prevent fading if the piece hangs in persistent bright light. Pair appropriate materials with a considered display location.
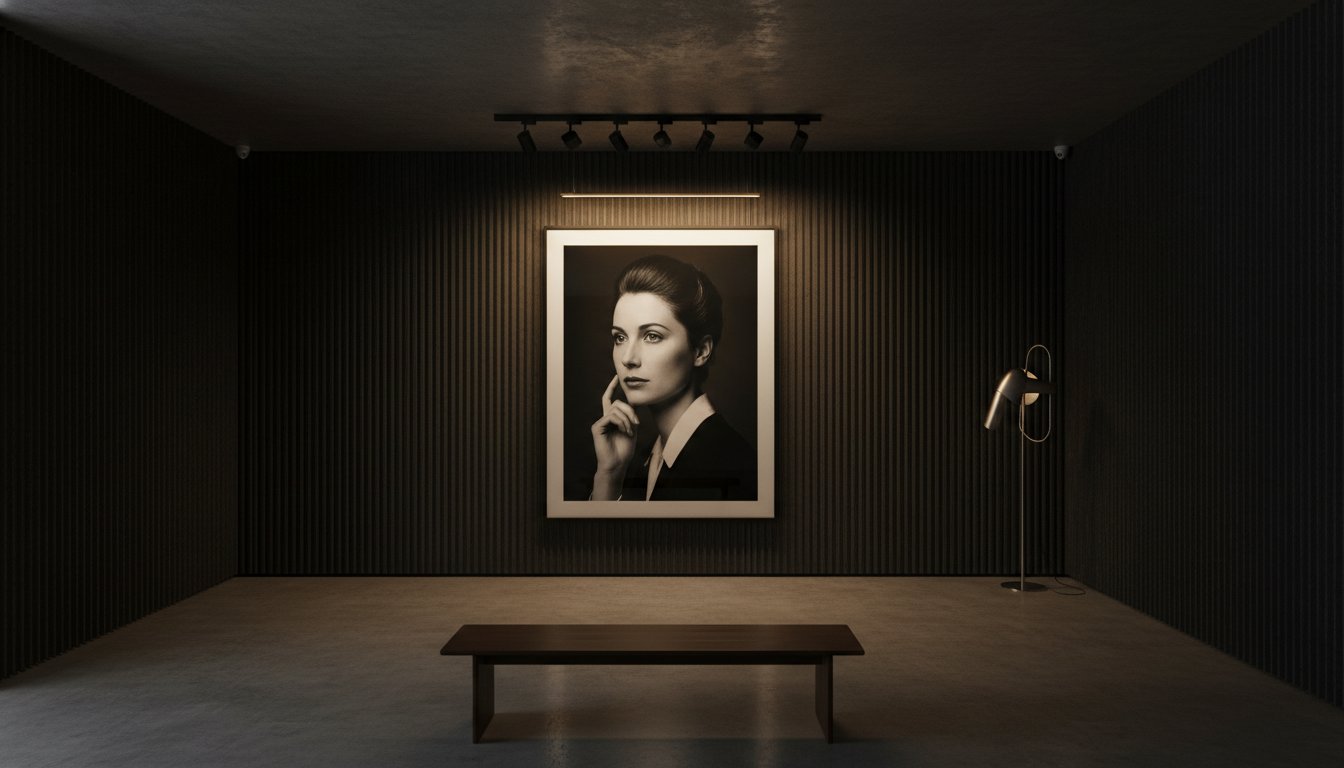
The Art of Illumination: Best Lighting for Artwork at Home in 2026

What if the most transformative element of your private collection isn’t the artist’s signature, but the invisible spectrum of light that brings it to life? Selecting the best lighting for artwork at home is the final act of curation, a decisive moment where technical precision meets aesthetic wonder. You likely understand the frustration of seeing a masterwork, perhaps a Terry O’Neill portrait, obscured by an aggressive glare, or the quiet anxiety that ultraviolet rays might slowly leach the soul from a vintage movie poster. It’s a delicate challenge to illuminate your space while acting as a guardian of your photographic heritage and a bridge to a bygone era of elegance.

This guide promises to demystify the science of the gallery glow, helping you achieve a warm, evocative atmosphere that preserves the value of every print. You’ll learn why a Color Rendering Index of 95 or higher is non-negotiable for true color accuracy and how the 2026 Matter smart home standard simplifies your setup. We’ll explore everything from the archival safety of 50-lux limits to the effortless elegance of wireless fixtures, giving you the confidence to light your collection like a professional curator.

Key Takeaways

  • Master the “Golden Ratio” of color temperature, ensuring your lighting falls between 2700K and 3000K to mirror the warmth of a professional gallery.
  • Understand why a Color Rendering Index (CRI) of 95 or higher is the essential metric for revealing the true depth and historical authenticity of your photographic prints.
  • Learn to apply the 30-degree rule to eliminate distracting glare, allowing you to achieve the best lighting for artwork at home while maintaining visual clarity.
  • Compare the traditional elegance of architectural picture lights with the versatile precision of modern track systems for larger curated collections.
  • Discover how modern LED technology serves as a guardian for your collection, effectively neutralizing the invisible enemies of UV radiation and heat.

The Curatorial Importance of Lighting for Fine Art Photography

Lighting serves as the silent interlocutor between a physical print and the observer’s emotional landscape. It’s the medium through which a static image transforms into a living narrative, inviting the viewer to step into a captured moment. When you seek the best lighting for artwork at home, you aren’t merely shopping for utilitarian fixtures; you’re designing an immersive experience. Standard overhead lighting, which is often indiscriminate and harsh, fails to respect the intricate layers of fine art photography. It flattens the work, stripping away the intentional depth and emotional resonance the artist labored to capture.

Consider the evocative poolside scenes of Slim Aarons. His work thrives on a specific, aspirational texture that requires precise illumination to truly sing. Without a curated light source, the sun-drenched vibrancy of a mid-century Italian villa can appear muted and lifeless. Effective lighting acts as a guardian of this aesthetic, ensuring that the shadows remain rich and the highlights remain crisp. This approach mirrors the rigorous standards found in the archival preservation of paintings, where light is treated as both a revelatory tool and a potential risk to the integrity of the medium.

Beyond Visibility: Creating a Narrative

The eye doesn’t naturally know where to linger in a complex photographic composition. Curatorial lighting guides the viewer through the frame, highlighting the primary subject while allowing the background to recede into a soft, atmospheric glow. While “flood” lighting provides a broad, utilitarian wash that often results in a sterile environment, “spot” lighting creates the focused intensity required for a true home gallery. This distinction is vital for vintage archives. The right beam can deepen color saturation and restore the luster of aged silver-gelatin prints, making the history they represent feel immediate and vital.

The Aesthetic Impact of Shadow and Highlight

Shadows are as essential as light itself, particularly when displaying black and white pictures. Directional light creates a sense of three-dimensional depth, preventing the flat appearance common with recessed ceiling lights. It also emphasizes the tactile, artisanal texture of premium archival papers. By angling the light correctly, you reveal the subtle grain and heavy weight of the paper, reminding the viewer that they’re looking at a lasting piece of history. Achieving the best lighting for artwork at home means honoring these tactile details through a measured, luxurious glow that establishes a museum-quality focal point in any room.

Technical Foundations: Understanding CRI, Kelvins, and Lux

To achieve the best lighting for artwork at home, one must move beyond the purely aesthetic and embrace the rigorous physics of illumination. While the emotional impact of a piece is subjective, the technical metrics that reveal its true character are absolute. For the discerning collector, three specific variables dictate whether a photograph remains a vibrant window into the past or becomes a dull, distorted shadow of itself: CRI, Kelvins, and Lux. This scientific approach ensures that your home gallery functions with the same quiet authority as a professional institution.

Mastering the Color Rendering Index (CRI)

The Color Rendering Index, or CRI, measures a light source’s ability to reveal the true colors of an object compared to natural sunlight. For those displaying high-caliber visual art, a CRI below 95 is unacceptable. A lower index muddies the spectrum; it can turn the crystalline turquoise of a Slim Aarons poolside scene into a murky, indistinct teal. In celebrity portraiture, such as the storied archives of Terry O’Neill, a high CRI is essential to preserve the subtle warmth of skin tones and the intricate textures of mid-century couture. Without this spectral precision, the historical authenticity of the work is compromised.

Kelvins and Color Temperature

Color temperature, measured in Kelvins (K), defines the mood and clarity of the light. The industry standard for residential galleries is the Golden Ratio of 2700K to 3000K. While 2700K offers a traditional, incandescent warmth, 3000K provides a sophisticated balance of clarity and invitation. It ensures that the whites in a Star Wars limited edition print remain crisp without feeling clinical. This warm light has a profound psychological effect, creating a sense of permanence and prestige that invites guests to linger on the page of history you’ve hung on your wall.

Intensity is the final pillar of a successful installation. Following established conservation guidelines for light exposure, sensitive materials like photographic emulsions should be kept at a maximum of 50 lux. For moderately sensitive works, such as certain cinema lobby cards, 250 lux is the upper limit. Modern museum-grade LEDs have replaced halogens as the gold standard because they offer up to 80% more energy efficiency and produce negligible heat. This transition ensures that the best lighting for artwork at home is also the safest for your long-term investment. When your lighting matches the caliber of your collection, the results are breathtaking. If you’re ready to start your journey with a masterpiece, consult our curator’s guide to collecting to find your next focal point.

Picture Lights vs. Track Lighting: Choosing Your Architecture

Selecting the structural framework for your illumination is a decision that defines the architectural soul of your home gallery. While the technical metrics discussed previously ensure color fidelity, the hardware you choose dictates the emotional intimacy of the viewing experience. For those curating a sophisticated space, the best lighting for artwork at home often comes down to a choice between the traditional prestige of the picture light and the versatile precision of track systems; often, sourcing these from a design-led curator like Norré Design ensures the fixture itself is as much a statement piece as the art it illuminates.

The Case for the Classic Picture Light

The over-the-frame picture light remains the gold standard for creating an intimate, self-contained glow. This method is particularly effective for smaller, historically significant pieces like cinema lobby cards, where the light creates a private world within the frame. When choosing a fixture, the finish should act as an extension of your bespoke framing; hand-rubbed brass or deep bronze adds a layer of historical authenticity that complements vintage aesthetics. In 2026, high-end wireless LED picture lights have become a premier choice for collectors. These rechargeable units offer the clean, wire-free look of a hardwired installation without the invasive electrical work, providing a professional finish with minimal disruption to your interior design.

Track Lighting for the Serious Collector

For those with large-scale prints or evolving gallery walls, track lighting offers unparalleled flexibility. It allows you to adjust beam angles and intensities for varying print sizes on a single wall, ensuring that a large-format Star Wars limited edition print receives the same curatorial attention as a smaller portrait. Modern tracks have evolved into slim, low-profile designs that virtually disappear into the ceiling architecture, supporting the 2026 trend of “seeing the light, not the fixture.” This system excels at layering light; you can use narrow spot beams for the artwork while allowing wider flood lamps to provide soft, ambient room lighting. This multi-layered approach prevents the “flat” look often associated with standard residential setups.

Minimalist collectors may prefer recessed wall washers, which provide a seamless wash of light across an entire surface. This approach is ideal for modern architectural spaces where the goal is a clean, unobstructed aesthetic. Regardless of the architecture you choose, the power dilemma is now easily solved. While hardwired solutions offer permanent stability, the advancements in high-end battery technology mean that even the best lighting for artwork at home can now be achieved with portable, high-CRI fixtures that honor the prestige of your collection without the need for complex wiring.

Step-by-Step Guide to Positioning and Installation

Achieving the best lighting for artwork at home requires more than an eye for beauty; it demands a curator’s precision in geometry. The most exquisite Star Wars limited edition print or Terry O’Neill portrait can be diminished by a single misplaced beam. Precision in placement is the hallmark of a true connoisseur, ensuring that every detail is revealed without the interference of distracting glares or heavy shadows. By mastering the physical relationship between the light source and the frame, you transform a simple wall into a prestigious gallery space.

Calculating the Perfect Angle

The gold standard of art illumination is the 30-degree rule, a calculation designed to eliminate the “veiling reflection” that often obscures high-gloss photography or glass-fronted frames. When the light is positioned at a 30-degree angle from the vertical, the reflected light is directed toward the floor rather than into the viewer’s eyes. If your collection features deep, artisanal frames, you may need to increase this angle slightly to avoid casting a shadow on the top of the print. A practical method to test this before installation is the flashlight test. Simply hold a light at the intended mounting point and observe the reflections on the glass. This simple step ensures that the final result is as polished as a professional exhibition.

Sizing Your Fixture

Proportion is essential for maintaining the visual balance of your display. As a general rule, a picture light should measure between one-half and two-thirds the width of the framed artwork. This ensures a broad, even wash of light across the entire image. However, exceptions exist for oversized landscape photography or wide-format Slim Aarons prints, where a longer fixture or multiple smaller lights may be necessary to prevent “fall-off” at the edges. Centering the fixture with absolute symmetry is non-negotiable for a formal gallery setting, as even a minor misalignment can disrupt the measured, luxurious rhythm of the room.

Height is the final variable in this curatorial equation. Artwork should generally be hung so the center of the piece is at the average eye level, which is approximately 145 to 152 centimeters from the floor. Once the art is positioned, the light must be adjusted to ensure the beam is centered on the focal point of the composition. To achieve the most sophisticated result, your hardware must be as high-quality as the art it illuminates. Our bespoke framing service provides the ideal foundation for this technical mastery, utilizing premium materials and glazing that work in harmony with your lighting design to preserve the soul of every image.

Preserving Your Collection: Lighting for Archival Longevity

As a dedicated guardian of photographic heritage, your responsibility extends beyond the initial acquisition; it encompasses the lifelong protection of the image’s soul. The “Invisible Enemy”—the combined forces of ultraviolet radiation and infrared heat—works silently to degrade the physical integrity of your collection. Achieving the best lighting for artwork at home is therefore a dual pursuit of aesthetic brilliance and rigorous archival defense. By controlling the environment, you ensure that the vibrant narratives within your frames remain as potent for future generations as they are today.

Mitigating UV and Infrared Damage

The science of photo-oxidation is the primary concern for any serious collector. This process occurs when high-energy light photons strike the surface of a print, breaking down the molecular bonds of pigments and organic paper fibers. The result is irreversible: colors shift, blacks lose their depth, and the paper itself becomes brittle. In 2026, museum-grade LED technology has become the undisputed champion of preservation. Unlike legacy halogen or incandescent bulbs, high-quality LEDs emit negligible ultraviolet radiation. Verified conservation standards suggest that UV content should never exceed 75 microwatts per lumen, with a strong preference for levels below 30 microwatts per lumen to ensure total safety.

The Role of Bespoke Framing in Light Management

True archival longevity is achieved through a synergy between illumination and protection. Galerie Prints recommends pairing professional lighting with museum-grade glazing. Our bespoke framing service utilizes specialized art glass that filters out up to 99% of harmful UV rays, acting as a secondary shield against environmental degradation. This non-reflective glass also enhances the effectiveness of your lighting design; it allows the light to pass through to the image without creating the “veiling reflections” that obscure fine details. When choosing your frames, consider deeper profiles that can elegantly accommodate modern, low-profile picture light brackets without compromising the structural integrity of the piece.

Finally, consider the duration of exposure. Even the best lighting for artwork at home should be managed with a measured approach. By utilizing the 2026 Matter smart home standard, you can establish a lighting schedule that illuminates your collection only when the room is occupied. This simple act of curation significantly reduces the cumulative light load on your prints. By combining technical precision with high-quality materials, you transform your home into a stable sanctuary for visual history, ensuring your investment remains a lasting piece of history for decades to come.

Elevating Your Collection into a Lasting Legacy

Mastering the interplay between light and shadow is more than a technical exercise; it’s a profound expression of reverence for the art you’ve chosen to live with. By prioritizing a high Color Rendering Index and adhering to the geometric discipline of the 30-degree rule, you ensure your collection is seen exactly as the artist intended. Implementing the best lighting for artwork at home is the final, essential layer in your journey as a collector, transforming a simple residence into a sophisticated sanctuary of visual history.

As an official partner of the Slim Aarons Archive, we provide access to museum-quality archival prints that deserve nothing less than curatorial excellence. Our handcrafted bespoke framing, produced with artisanal precision in London, serves as the perfect foundation for your lighting design. Whether you’re showcasing iconic music archives or limited edition cinema posters, the right illumination acts as a guardian of your investment. It’s time to bring your walls to life with the prestige they deserve. Explore our Curated Collections and Bespoke Framing Services to begin the next chapter of your home’s narrative. Your collection is a piece of history; let it shine with enduring brilliance.

Frequently Asked Questions

Can LED lights damage my photographic prints over time?

Modern LEDs are the safest choice for illuminating sensitive collections because they emit negligible heat and ultraviolet radiation. Unlike legacy halogen bulbs, high-quality LEDs don’t cause the photo-oxidation that leads to fading or brittle paper fibers. To ensure maximum protection, select fixtures with a UV output below 75 microwatts per lumen. This technical precision acts as a guardian for your photographic heritage.

What is the best color temperature (Kelvins) for lighting fine art photography?

The industry standard for fine art photography falls between 2700K and 3000K. This range provides a sophisticated, warm glow that mirrors the atmosphere of an elite gallery. While 2700K offers a traditional, incandescent warmth, 3000K is often preferred for contemporary prints. It provides a crisp clarity that reveals the true depth of the artist’s work without feeling clinical or cold.

How do I avoid glare on the glass of my framed artwork?

You can effectively eliminate distracting reflections by positioning your light source at a 30-degree angle from the vertical. This specific geometry ensures that any light bouncing off the glass is directed toward the floor rather than into the viewer’s eyes. Pairing this technique with museum-grade, non-reflective glass in your bespoke framing will result in a perfectly clear, unobstructed viewing experience.

How wide should my picture light be compared to my frame?

A picture light should ideally measure between one-half and two-thirds the width of the framed artwork. This proportion ensures an even, luxurious wash of light across the entire composition without dark fall-off at the edges. For oversized landscape photography or panoramic prints, you may need to select a longer fixture to maintain perfect visual balance and symmetry across the wall.

Do I need a hardwired light or are battery-powered picture lights good enough?

While hardwired solutions offer permanent stability, high-end battery-powered lights are now a prestigious alternative for achieving the best lighting for artwork at home. Modern rechargeable units in 2026 provide the same high CRI and color temperature as traditional installations. They are an excellent solution for historic homes where you wish to avoid invasive electrical work while maintaining a professional aesthetic.

What is the 30-degree rule in art lighting and why does it matter?

The 30-degree rule is a curatorial standard used to calculate the optimal mounting distance to prevent glare and frame shadows. By angling the light 30 degrees from the vertical, you ensure the beam hits the focal point of the print with precision. This technique is essential for highlighting the artisanal texture of the paper while keeping the frame from casting a shadow over the image.

Can I use smart bulbs or dimmers for my art lighting?

Smart bulbs and dimmers are highly recommended for creating a measured, luxurious atmosphere in your home gallery. Utilizing the Matter smart home standard allows you to integrate your art lighting into a cohesive system that adjusts throughout the day. Dimmers are particularly valuable for conservation; they allow you to reduce light intensity and exposure time, which helps preserve the value of your collection.

Is it better to light a gallery wall with individual lights or one track?

Track lighting is generally the superior choice for a gallery wall because it offers unparalleled flexibility for evolving collections. It allows you to adjust individual beam angles and positions for varying print sizes on a single surface. Individual picture lights are better reserved for solitary, iconic pieces where you want to create a self-contained, intimate glow that emphasizes the work’s historical significance.