
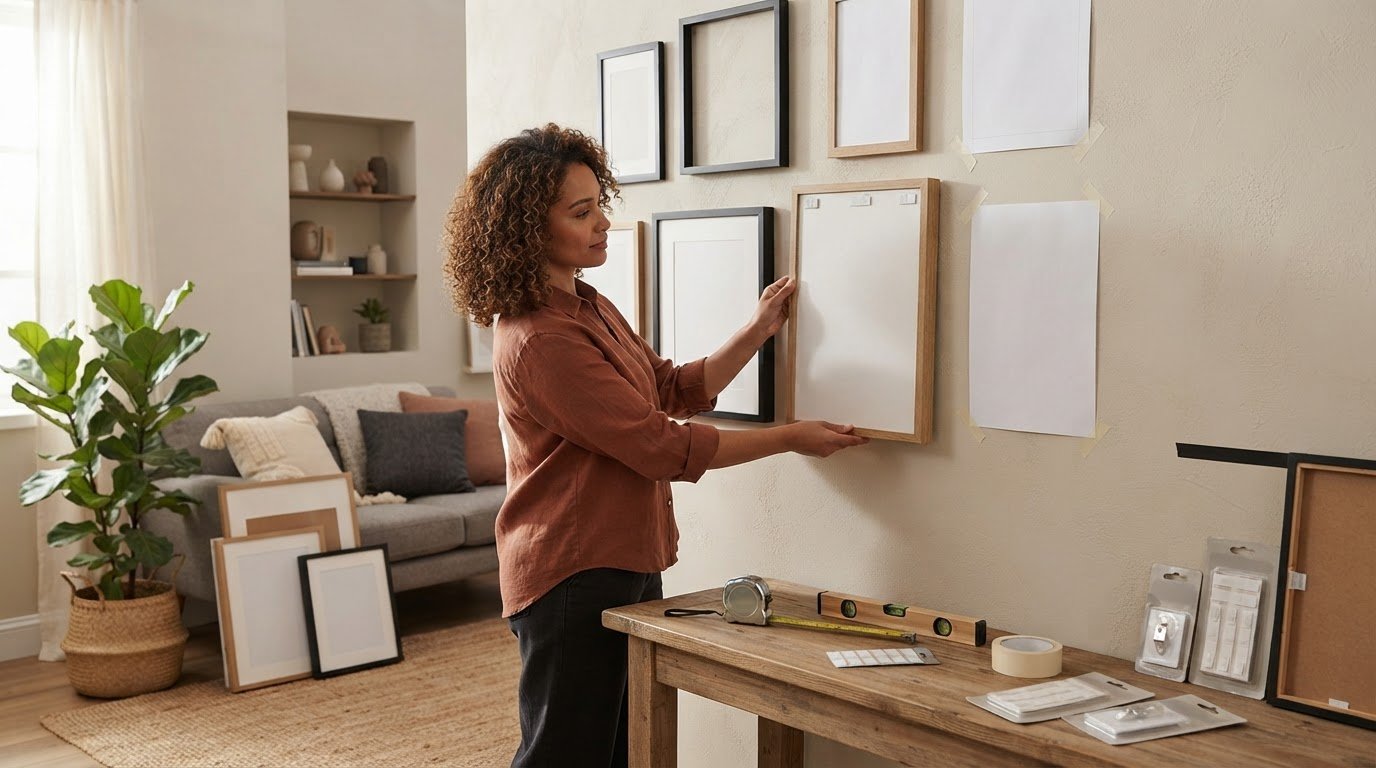
What if a gallery wall could feel thoughtfully composed without leaving nail holes behind? The key to how to hang a gallery wall without nails isn’t choosing one adhesive and hoping for the best. It’s matching the hanging method to each frame’s weight and design, the wall surface, and how easily you may want to rearrange the display.
It’s understandable to hesitate before pressing an adhesive strip onto painted walls, especially when you’re unsure whether it will hold securely or come away cleanly. And even a beautiful collection can feel unbalanced if you commit to hanging before testing the layout. This guide will help you plan a cohesive arrangement, compare nail-free options such as adhesive strips, hooks and picture rails, and understand their limitations. You’ll also find out when a leaning or freestanding display may be more suitable. With careful preparation, considered spacing and artwork that works together in scale and mood, your gallery wall can feel polished without rushing the decisions that make it your own.
Key Takeaways
- Map frame sizes and spacing on paper or with templates first, so you can refine the composition before choosing a mounting method.
- Learn how to hang a gallery wall without nails by matching each frame’s weight and hanger style to a suitable support and wall surface.
- Follow the chosen hanging product’s instructions and load limits, and check its surface requirements before installation.
- Compare fixed and adjustable displays to decide whether you prefer a settled arrangement or the freedom to rearrange pieces.
- Bring the composition together through considered image scale and frame finishes. Exhibition-quality prints and professional framing can help create a cohesive display.
How to plan a gallery wall without nails before you hang anything
Want to bring a collection of art into a room without drilling holes, making repairs or committing to a permanent arrangement? Begin with the composition, not the adhesive. A successful gallery wall feels considered as a whole: each frame has room to breathe, while the group relates to the furniture, architecture and other details around it.
The term “gallery” has both architectural and artistic contexts, as the broad overview of Gallery (disambiguation) illustrates. At home, the aim is to make a personal display feel intentional. The best hanging method depends on the frames, wall surface and how easily you want to change the arrangement. Follow this sequence before applying adhesive or installing a support:
- Choose the wall. Identify the area you want the display to occupy.
- Measure and record. Note the usable wall space and each frame’s dimensions, orientation and approximate weight.
- Arrange the group. Experiment with the artworks’ positions and visual relationships.
- Test the layout. Use paper templates to check the scale and spacing on the wall.
- Choose a method and mount. Once the layout is settled, match the hanging approach to the frames and surface.
Which wall and artwork should you plan around?
Measure the wall’s width and the height available for art, then account for nearby furniture edges, switches and other features that affect the display. These boundaries help define the composition’s footprint before you start moving frames. A console table, for instance, can act as a visual anchor, while a nearby switch may call for extra breathing room at one side.
Make an inventory of every frame, noting its height, width, orientation and approximate weight. Then consider visual balance rather than aiming for identical spacing or a rigid grid. A larger frame might anchor one side, with smaller works arranged around it. Repeated colours or related subjects can help varied sizes feel connected. This inventory also gives you useful information for choosing a hanging method later.
How can you test the arrangement before mounting?
Trace each frame onto paper and label the outline with its corresponding artwork. Arrange the templates on the floor, where it’s easy to move pieces and compare configurations. Try keeping a few frames aligned while letting others create a looser rhythm. The goal is a composition that feels balanced, not mechanically uniform.
Once the arrangement feels promising, temporarily transfer the templates to the wall using a method suitable for the surface. View the display from across the room and check that the group sits comfortably in its space. Notice whether any frame seems crowded or disconnected. Adjust the paper shapes until the composition feels resolved. Only then choose the mounting approach, keeping each frame’s weight, hanger and wall requirements in mind.
Which nail-free gallery-wall methods suit your artwork and wall?
The best option isn’t simply the one that leaves the fewest marks. A mounting method needs to suit the frame’s weight and hanging hardware, the wall’s finish, and how often you may want to rearrange the display. Adhesive strips and hooks attach directly to the wall. Picture rails support hanging points along a rail, while leaning and freestanding arrangements display art without attaching frames to the wall.
| Method | Wall contact | Frame compatibility | Rearrangement and visibility |
|---|---|---|---|
| Adhesive strips | Adhesive attaches to the wall and frame | Typically suited to compatible flat-backed frames; follow the product’s intended use and load limit | Can be less visible, but moving a frame may mean replacing strips |
| Adhesive hooks | Adhesive hook stays on the wall | Works with frames whose wire or sawtooth hanger fits the hook | Hook may show; repositioning depends on product instructions |
| Picture rail | Frames hang from a rail, not directly from separate wall points | Works with compatible wires, cords or hanging hardware | Often easier to adjust along the rail; the rail remains visible |
| Leaning display | No frame attachment to the wall | Frames rest on a suitable ledge, shelf or furniture surface | Easy to restyle; frame edges remain visible and need secure placement |
| Freestanding display | No wall-mounted frame points | Depends on the stand, easel or display furniture | Can be moved as a unit; the supporting structure is part of the display |
When are adhesive strips or hooks worth considering?
Adhesives are worth considering when the frame and wall suit the specific product. Check its stated weight limit and intended use, then read the instructions for compatible wall materials, paint condition, application and removal. Some adhesive hangers are designed for smooth, sound painted surfaces, while wallpaper, textured walls or recently painted surfaces may not be suitable. Don’t assume that every product will hold securely or come away without damage on every surface.
When do rails, leaning or freestanding displays make sense?
An existing picture rail, or a compatible rail system already in place, can make it easier to adjust a group without attaching each frame separately. If adding a rail would require new wall fixings, account for that before choosing it. Leaning art on a stable shelf or using a freestanding display avoids wall-mounted frame points altogether. Both options need adequate space and stable placement, especially near furniture edges and walkways.
For how to hang a gallery wall without nails, narrow the choices according to the wall and frames, then weigh visibility against flexibility. If you’re still selecting images and frames, exhibition-quality photographic prints can help you develop a cohesive display before settling on its final arrangement.
How to choose a safe nail-free method for heavier frames and delicate walls
No adhesive or hanging system suits every frame and wall. A lightweight frame on smooth, sound paint presents a different challenge from a heavy piece on textured plaster or a wall with flaking paint. For how to hang a gallery wall without nails safely, assess the frame and surface together, then follow the chosen product’s instructions rather than relying on a general rule about what adhesives can hold.
Start with the frame’s complete hanging weight, including its glazing and hardware. Compare it with the product’s stated load limit and intended use, and check whether that capacity applies to one hanger or a particular number of pairs. A rating applies to the product and its installation conditions; it isn’t a guarantee for every wall or frame. A wire, sawtooth hanger and flat-backed frame may also need different supports.
What should you check before using adhesive on a wall?
Identify the wall material and inspect the finish closely. Look for loose or chipped paint, cracks, rough texture, dampness or signs that the surface coating isn’t firmly attached. Wallpaper and textured walls are generally unsuitable for adhesive hangers, and fresh paint needs time to cure. Guidance in the article recommends waiting at least seven days, and up to 30 days, before applying strips. Follow the adhesive maker’s instructions for the specific surface and paint.
Prepare the wall exactly as directed. Some adhesive guidance calls for cleaning with isopropyl, or rubbing, alcohol to remove dust and grime, but the product instructions should determine the appropriate preparation. Observe any specified waiting time before loading the hanger. If the instructions allow it, test the adhesive in an inconspicuous spot first. A test can reveal a surface concern, but it can’t guarantee how a larger area will perform or how removal will affect paint.
What if a frame is too heavy or the surface is unsuitable?
Don’t exceed a hanger’s stated capacity, and don’t combine multiple products to increase support unless the manufacturer specifically provides guidance for that arrangement. Adding extra adhesive may not resolve a mismatch between the frame, wall finish and hanger. If the surface is fragile, damp, textured or poorly adhered, don’t rely on adhesive alone to support valuable work.
Consider a picture rail where an existing rail or compatible system is available, or choose a stable leaning or freestanding display that doesn’t rely on adhesive frame points. These alternatives still require careful placement: set artwork back from unstable edges, keep it clear of high-traffic routes and avoid spots where doors, furniture or everyday movement could knock it. For a cherished or particularly heavy piece, choosing a display that doesn’t depend on uncertain adhesion is the more prudent decision.
How to arrange and install a nail-free gallery wall step by step
A settled composition makes installation more deliberate. Before you begin, group the frames by the method they’ll need: adhesive strips, hooks, a rail or a display that rests on furniture may each call for different placement and preparation. Keep layout decisions separate from product instructions. You can plan the arrangement in advance, but surface preparation, application pressure and waiting times must come from the specific hanging product’s guidance.
Plan, test, match, mount and inspect. This sequence keeps the artwork’s composition and the practical requirements of installation in view.
- Group the frames. Set out the pieces in your intended arrangement, checking how their sizes, orientations and visual weight work together. Keep the sequence consistent as you transfer the layout.
- Transfer the composition. Use full-size paper templates to mark each frame’s footprint and intended position. Mark the top edge or hanging point on each template where useful.
- Review the layout. Step back and check spacing, alignment and the relationship of the group to its surroundings. Adjust the templates before selecting or applying any hanging hardware.
- Match each frame to a method. Use the frame’s weight and hanger style, the wall surface and the product’s instructions to decide how each piece will be supported. Don’t assume the same method suits every frame.
- Mount and inspect. Apply each support as directed, place the frames, then check that they sit securely and the whole arrangement remains level and balanced.
How do you transfer a paper layout to the wall?
Arrange your full-size paper templates on the wall according to the composition, aligning them with the measured positions from your plan. Temporary, low-impact markers can indicate frame edges or hanging points, but choose a marking approach that’s suitable for the wall finish and remove it according to its instructions. Don’t treat a marker or tape as a substitute for a tested hanger.
Before attaching hardware, review the gaps between frames and check that their top edges or centres create the intended rhythm. Look from across the room as well as nearby. If one template appears crowded or out of line, move it now. Small changes are easier before a support is in place.
How do you apply the chosen method carefully?
Follow the exact preparation, placement, pressure and waiting directions supplied for your chosen product. These details differ. Advice described by Food52 or Thomas Kinkade may illustrate a particular application, but it isn’t a universal instruction for every adhesive, wall or frame. Don’t substitute a waiting time or surface-preparation step from one guide for the manufacturer’s directions for another product.
Once the frames are in position, pause before calling the display complete. Check each one individually for secure contact or support, then step back to review the group’s alignment. If anything shifts or feels unstable, remove the artwork and reassess the method rather than leaving it in place.
With the installation plan in hand, bring the composition together with exhibition-quality photographic prints selected for their scale and relationship to the surrounding frames.
Choose artwork and framing for a gallery wall that feels complete
A considered display is more than a set of frames arranged side by side. The images, their scale and the finishes around them create a visual conversation, whether you’re gathering photographs from one era or bringing different subjects together. Let the artwork lead, then use framing and placement to give the collection a sense of unity without forcing every piece into the same style.
How can different images feel cohesive together?
Look for a shared thread that helps varied works belong together. It might be a recurring subject, a similar tonal range, a particular mood or a frame palette that brings contrast into balance. Photographs with distinct subjects can still feel connected when their tones relate, while frames in complementary finishes can tie together images that differ in colour and period.
Mix portrait and landscape orientations to give the arrangement movement, then consider how larger and smaller images balance across the group. A single dominant image can anchor a composition, while smaller works provide rhythm around it. You don’t need identical spacing or matching frames for the wall to feel coherent. Treat the display as a personal edit: select pieces that reward a closer look and arrange them in a way that feels considered in your room.
How can print and frame choices support the display?
Scale matters visually and practically. Before settling on a hanging method, note each finished frame’s dimensions and weight, including the frame and glazing, not only the print size. A change in frame profile can alter the overall dimensions and finished weight, so choose supports based on the completed piece and the specific product’s instructions.
Galerie Prints offers exhibition-quality prints and professional framing for prints purchased through the gallery. Bespoke services can tailor sizing and cropping, and printing is available on any substrate, including aluminium, wood and glass. These choices can help shape a cohesive display, but they don’t determine the hanging method. Assess the finished work and match it to a suitable support. Bespoke framing is an artwork and presentation option, not a nail-free mounting system.
With the practical plan in place, refine the final selection around the images you want to live with and the scale your wall can accommodate. To explore artwork for a considered display, explore exhibition-quality photographic prints.
Give your collection room to take shape
A gallery wall can evolve alongside the room and the stories you want it to hold. Rather than treating the arrangement as fixed, leave yourself space to introduce a new image, move a frame or let one photograph become the quiet focal point. The most satisfying display isn’t necessarily the most symmetrical; it’s the one that feels considered and personal each time you pass it.
As you decide how to hang a gallery wall without nails, let the artwork guide the final choices. Consider what you want the collection to evoke, then bring together images whose subjects, tones or history speak to one another. Galerie Prints offers exhibition-quality photographic prints, with professional framing available for prints purchased through the gallery, giving you a considered starting point for the pieces you’ll live with.
Explore exhibition-quality photographic prints and start shaping a collection for your wall. Take time with the composition and let the finished display feel unmistakably yours.
Frequently Asked Questions
Why hang art without nails?
Hanging art without nails can help you avoid drilling into a wall, which is useful in a rental, a freshly decorated room or a space where you want to limit permanent changes. It also leaves room to reconsider the display as your collection grows. The trade-off is that “nail-free” doesn’t always mean damage-free: some methods still touch the wall, so consider the finish and your plans for the space.
What is the best alternative to wall nails?
The best alternative depends on the frame, wall and whether you expect to rearrange the display. Adhesive hangers may suit compatible frames on suitable surfaces, while an existing picture rail can allow repositioning without adding separate wall points. For how to hang a gallery wall without nails when you want no frame attachment to the wall, a stable shelf or freestanding support may be a better fit.
How do you hang very heavy artwork without nails?
For very heavy artwork, don’t rely on an adhesive unless the manufacturer’s stated capacity and installation conditions explicitly suit the complete framed piece. If you want to avoid nails and wall holes altogether, consider a stable floor easel or sturdy furniture that can support the artwork securely. Keep the frame away from edges where it could topple, and choose a position protected from passing traffic and accidental bumps.
Are adhesive strips suitable for hanging picture frames?
They can be suitable for frames that match the strips’ intended use, provided the frame’s total weight is within the stated limit and the wall surface meets the instructions. A flat-backed frame may suit strips better than one designed to hang from a wire. Paint condition matters too: loose paint, texture, wallpaper or paint that hasn’t fully cured can make adhesion unsuitable. Removal can affect finishes, so don’t assume it will be mark-free.
Can picture rails be used to hang art without nails?
Yes, when a suitable picture rail is already in place, compatible hooks and cords can support art without attaching each frame directly to the wall. The rail itself may have been fixed to the wall, so it avoids new frame-by-frame attachment rather than necessarily making the entire setup hole-free. Check that the hanging hardware suits each frame, and consider how visible the rail and cords will be in your arrangement.
Can artwork be displayed without attaching it to a wall?
Yes. You can lean framed pieces on a deep shelf or use a freestanding easel, screen or display unit, creating a presentation that can be changed without wall-mounted frame points. For a group, vary frame heights while keeping each piece stable and supported. Avoid narrow or unstable surfaces, and leave enough clearance that people, doors or nearby objects won’t knock the artwork out of position.